There’s nothing like the sharp, trying-not-to-swear pain of stubbing your toe on concrete to get you thinking about pool deck resurfacing. It might feel like an unnecessary cosmetic chore, but keeping your concrete in good condition is also paramount to your pool’s health.
When you make it part of your regular pool maintenance, cleaning your deck, repairing cracks, and sealing the concrete can save you from stress and expensive fixes, not to mention help keep all your toes intact.
How Pool Deck Resurfacing Makes Your Life Easier
Aside from the fact that cracked concrete looks a little shabby, too many cracks can make your pool area extremely dangerous for your swimmers and your wallet.
Sharp concrete edges aren’t exactly friendly to bare feet. And even a light fall on concrete while wearing a swimsuit can mean more than just skinned knees.
Then there’s the financial danger of poorly maintained concrete. When water seeps into unattended cracks, it can end up collecting behind the walls of your pool. Too much water can shift the soil and damage the structure, cracking your liner and causing a pool leak.
We probably don’t need to remind you how expensive that can be, but we’re going to anyway.
- Finding a leak yourself costs nothing. But if you can’t find it, you’ll spend a few hundred dollars for a pro to find and repair the leak.
- Having a professional do a vinyl patch job can cost a couple hundred dollars.
- Replacing an entire vinyl liner can cost more than a thousand dollars.
- Repairing your concrete foundation can run about $65 per linear foot, depending on what type of liner you have and where you live.
- Filling in hollow spots behind your concrete foundation can cost between several hundred and more than a thousand dollars depending on the size of your pool.
So you see how a few seemingly innocuous cracks can lead to expensive pool repairs. But you can avoid those repairs by resurfacing your pool deck and then keeping up with regular concrete maintenance.
Where Those Darn Cracks Come From
Overall, concrete is a pretty durable material. But if it has one major weakness, it’s the weather. Even though it looks solid, concrete contracts and expands with changes in temperature. A 40°F (4°C) drop in temperature can result in a 0.03 inch contraction. It might not seem like much, but it’s enough to cause cracks.
Another factor is improperly laid concrete. If the concrete used for your deck was improperly mixed or finished on a particular windy day, it can stress the slab and lead to surface or structural cracks. The problem is, you won’t know it was poorly done until it’s too late.
Frustrated by adding chemicals and trying to keep your pool clear all the time?
We cut out all the confusion of pool maintenance in this easy-to-read illustrated ebook and video course. It'll help you save $100 right away on pool care!
Click Here to Learn More
How to Tackle Common Concrete Pool Deck Repairs
Have you already noticed a few cracks in your concrete pool deck? Don’t panic. You can head off the major damage and costly repairs by making a few fixes as soon as you see those cracks appear.
Live Somewhere Cold? Read This First
If you live in the kind of place where you joke about having winter eight months out of the year, concrete maintenance can be a chore and a half. That’s because exposure to cold weather adds a slew of additional cracking opportunities for your deck.
It also means you need to be careful about when you repair your cracks. If you live in an area with spring blizzards and summer hail storms, you need to pay attention to the forecast before you even consider doing repairs.
You need at least 24 hours of non-freezing conditions before laying concrete. You also want to make sure your repair concrete is just as cold as or colder than the ambient air temperature when you place it.
Cold concrete has a longer curing time, giving it more strength and durability in freezing conditions. Warm mixtures dry faster, which means less overall strength.
Above all, be sure to read your concrete manufacturer’s instructions when laying in a cold weather area. They will often have the best recommendations for their product.
Repairing Cracks
The smaller the crack is, the easier it is to repair. Once you do your own minor pool deck resurfacing a few times, it’ll be a chore as easy as washing dishes or mowing the lawn.
For larger cracks, you may want to speak to a professional if this is your first repair job. Watching a professional can give you a better sense of how to tackle a large repair later.
What You Need
- Garden hose
- Wire brush
- Chisel
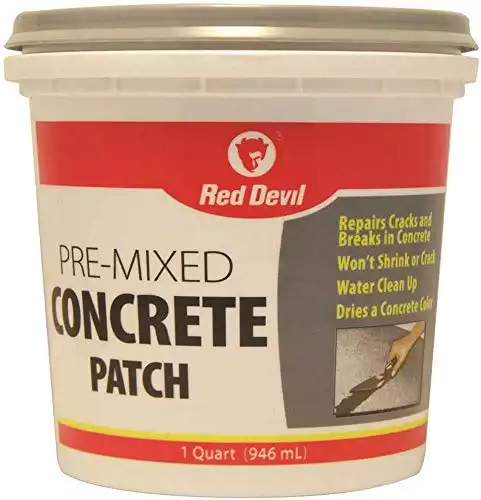
- Pre-mixed mortar
- Water
- Epoxy paste
- Trowel or wood float
- Heavy-duty paint brush
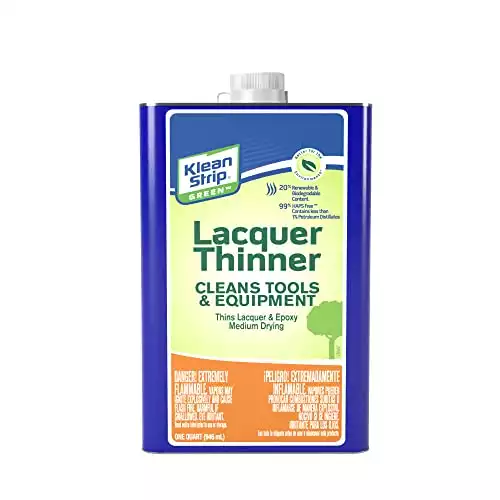
- Paint thinner
Instructions
- Spray the cracked area with your garden hose. Make sure to clear as much debris as possible from the crack. Treat it like cleaning a cut—you want to make sure all the bad stuff is out.
- Find any hollow areas of the crack by tapping along the edges with the end of your wire brush. (Fun fact: This is called sounding the concrete.) If an area of concrete is higher pitched when tapped, that means it’s hollow.
- Carefully chisel away any hollow concrete until you’re left with solid concrete. This may mean widening the crack, but it will keep you from doing multiple repairs in the same area.
- Use your wire brush to clear any debris from the crack.
- Let the concrete dry.
- Important: Mortar and epoxy can dry really fast! Make sure you have everything ready to go before you start mixing.
- Once the surface is dry, use your trowel to mix the mortar (if necessary) according to the manufacturer’s instructions.
- Add the epoxy paste to the mortar according to the manufacturer’s instructions.
- Use the trowel to place the mortar-epoxy mixture into the crack. Do your best to fill it completely. Any air pockets can cause damage later.
- Smooth the repaired surface with your trowel or wood float until it’s even with the surrounding concrete.
- Immediately clean the mortar and epoxy off your tools using paint thinner, followed by a thorough rinse in water.
- Let the repaired concrete dry for at least 24 hours before walking or placing anything on it.
Tip: Remember to regularly check your deck during the off-season. Just because you’re not using it doesn’t mean cracks may not be developing. Even if it’s too cold to do any repairs, it’s better to keep track of potential problem areas throughout the year so you can fix them as soon as possible.
Leveling Concrete
Sometimes the ground under your deck can compress. Concrete is, after all, pretty heavy. Since you often lay concrete in sections rather than a single strip, sunken sections can create an uneven path. These disparate levels can create a more suitable environment for concrete cracking and toe stubbing.
In this case, you need to either replace your current concrete, or level the slab. And if the internet has taught us anything, it’s that someone has DIY instructions for every home project.
But you have to ask yourself: is a DIY project worth my time and frustration? Will I save that much money doing it on my own?
In the case of leveling concrete (which is sometimes called slabjacking or mudjacking), the answer is probably no. Do not do this on your own, unless you’re a professional mason. This project requires some serious tools—like a diamond-tipped core drill and a hydraulic concrete pump—that you probably don’t have lying around.
Save yourself the time, stress, and money by leaving this pool deck repair to the professionals.
How to Reduce the Need for Repairs
Once you’ve finished your pool deck resurfacing project, you’ll know how much elbow grease goes into tackling this chore. And you probably won’t want to do it again. There’s good news: You don’t have to bother with resurfacing for a while as long as you properly maintain your pool deck.
But you already knew that was coming, didn’t you? We’re all about the maintenance here!
The truth is, repair and maintenance go hand in hand when it comes to concrete. If you keep up with small cracks as they appear, you’ll save yourself a ton of money and effort later on. The same goes for sealing your deck on an annual basis.
A dirty pool deck offers a perfect environment for weeds, algae, and fungus to grow between the concrete sections. Not only is this unsightly, it can be dangerous. Algae and fungus are slippery, especially when they’re wet.
A clean deck not only reduces potential slippery areas, but also keeps unwanted flora from taking root and breaking into your concrete. Regularly pressure washing your pool deck goes a long way to keeping your surface safe, clean, and more crack-resistant.
Time to Get Out the Big (Water) Gun
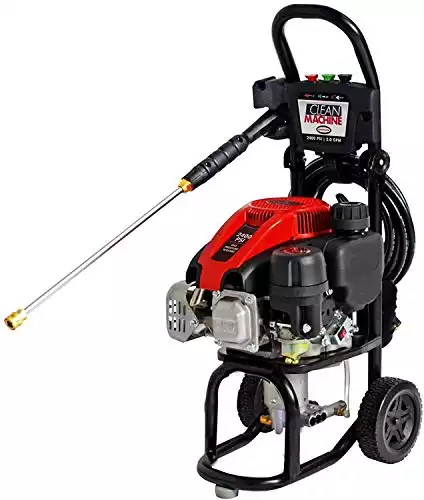
If you have a pressure washer in your garage, you’re halfway to a clean pool deck already. If you don’t own one, you can often rent one from your local hardware store (or borrow your neighbor’s, if you have a super nice neighbor).
Even if you can’t invest in one now, a good pressure washer is something to think about in the future. They make cleaning concrete a snap, whether it’s your pool deck or your driveway.
What You Need
- Water source
- Pressure washer
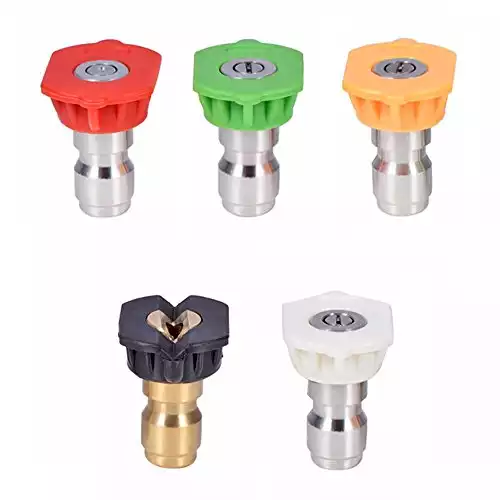
- 15- or 25-degree spray tip
- Muriatic acid
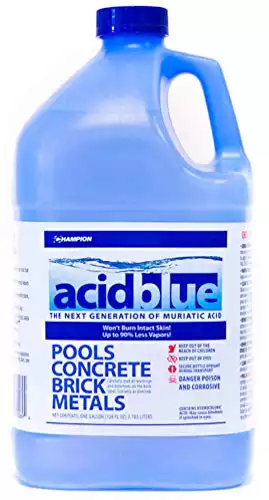
Used for lowering alkalinity and pH in your pool water. It's also used for cleaning pool filter grids, filter cartridges, and concrete pool surfaces.
Instructions
- Clear your deck of any furniture, plants, pool toys, pets, and children.
- Connect your pressure washer to a water source.
- Rinse your deck to remove any leaves or debris. If you miss anything, it can leave unsightly marks after washing, so be thorough.
- Apply the muriatic acid according to the manufacturer’s instructions. If your pool deck is large, work in parts to break up the job.
- Attach a 15- or 25-degree spray tip to your pressure washer wand, hold the wand at a 90-degree angle, and spray the deck clean.
- Thoroughly rinse your deck with the pressure washer a second time to ensure all the acid is gone.
- Repeat as needed. If you run into a particularly tough stain, you may have to scrub it or let it soak longer so the acid can do its job.
Sealing Your Deck (DO NOT SKIP)
Hey, did you notice how we basically yelled at you to not skip this step? That’s because sealing can save you a ton of work in the long run. Sealing your pool deck helps protect the surface and slows cracks from developing and spreading. Consider doing this on an annual basis to refresh and protect your deck.
What You Need
- Pressure washer
- Muriatic acid
- Deck brush or scrub brush
- Water source
- Paint roller and extension pole
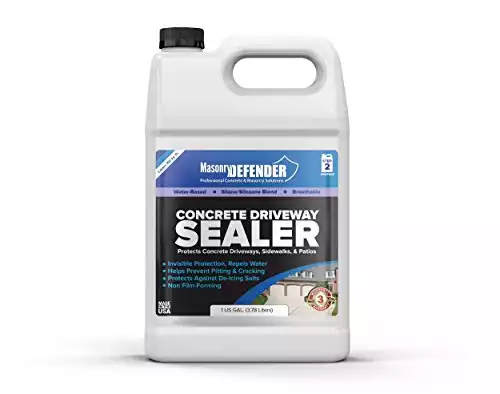
- Concrete sealant
Instructions
- Pressure wash your entire deck using the muriatic acid per the manufacturer’s instructions.
- Rinse your deck thoroughly with the pressure washer.
- Let the deck dry completely.
- Using the paint roller, coat a section of the deck as long as your paint roller pole with sealant. It’s best to work in overlapping strokes. If your concrete is more porous, it may require more sealant.
- Coat the section until you can see a visible layer of sealant.
- Wait five to ten minutes.
- Add a second coat of sealant to the section.
- Repeat steps 4 through 7 with the next section of your deck until the entire thing has been sealed.
- Allow your entire deck to dry for at least one hour before stepping or placing anything on the sealant.

Extreme Makeover: Pool Deck Edition
Aside from maintenance and fixes, resurfacing your pool deck offers one more benefit: beautification. Maybe you’re tired of your bland, gray concrete deck and you want something a little more colorful and contemporary.
This is where complete pool deck resurfacing comes in. Unless you’re a mason or a hardcore DIYer, you’ll want a professional to handle it. It’s usually a fairly inexpensive process.
The professional mason will apply a thin layer of concrete around the entire perimeter of your pool either with a trowel or a special sprayer. Any cracks or other minor damage will be repaired at this time.
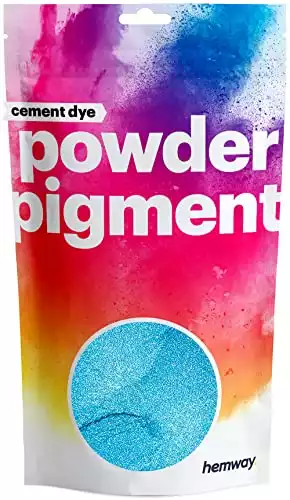
You can add any color you like to the concrete, whether it’s a warm tan to make your pool look like a desert oasis, or a sparkling aqua reminiscent of the ocean. You can even match the exterior of your home, if you like. The possibilities are endless.
And it’s not just about color. You or your pro can add flair like intricate scrollwork or a brick pattern. You may even be able to have the concrete deck look like a wood deck, so you get the rich and rugged look of wood without the splinters and regular staining.
Don’t feel like you’re stuck with a plain pool deck just because it’s made from immovable concrete. With a little imagination and elbow grease (or the right pro), you can have a gorgeously resurfaced pool deck in a weekend’s time.
An Ounce of Maintenance Now is Worth a Pound of Resurfacing Later
Remember, the more quickly you take care of concrete damage, the less you’ll have to worry about any major pool deck resurfacing or repairs. Patch small cracks as they come up, and regularly pressure wash your deck to prevent the buildup of dirt, moss, and grime that aggravates cracking.
And once you’ve got those pesky cracks fixed, consider total pool deck resurfacing to enhance your little slice of paradise, not to mention improve curb appeal if you ever plan to sell. You’ll be glad you did.
Happy Swimming!

Recommended Guides
Repairing or replacing pool caulking may sound like a huge chore, but it’s actually pretty simple. More importantly, it can save you thousands of dollars.
Do you know how to drain a pool? Above ground is simple. But draining an inground pool incorrectly could destroy it. Learn the right ways for both.
Leave a crack in your concrete pool for too long, and you could have a leak on your hands. Learn how to perform pool plaster repair before that happens.
Learning how to patch a pool liner could save you thousands of dollars and prevent extensive damage. Plus, it's easy enough that almost anyone can do it.