You’ve probably never sat by your beautiful pool, sipping a cool beverage, wondering how to patch a pool liner. It’s far more likely you’ll be all set to jump in for a refreshing swim, but stop dead in your tracks when you notice the yard by your inground pool feels swampy. Maybe you’ll glance out the back window just before your first sip of coffee in the morning, and see a growing waterfall has sprung from the side of your above ground pool.
If you’re reading this, you may have just discovered the need to patch your vinyl pool liner, and that’s never a fun discovery. You may even be freaking out a little. Take a breath. Unless you have a very old liner, a massive tear, or a tree fell on your pool, you can probably patch it.
Why Should You Learn How to Patch a Pool Liner?
Depending on the size and location of a leak, you could face serious damage if it isn’t addressed quickly.
Above Ground Pool Dangers
If an above ground pool springs a leak, the water will drain until it reaches the level of the hole. If the leak is near the top rail, the water might only go down a couple of inches. But if it’s near the bottom of the wall or the floor of the pool, the extensive water loss could collapse the pool and turn your yard into a muddy mess.
Inground Pool Dangers
A leak in your inground pool liner can also cause a lot of damage. The water can create a pocket of liquid under your pool deck or cause soil erosion, leading to instability and deck cave-ins. It can also cause rust on steel pools, or erosion of concrete ones.
While those issues can be repaired, you can only find them if you completely remove and replace your inground pool liner. The best course of action is to stop the leak as quickly as you can.
Tip: If you’ve just found a leak and you’re trying to figure out what to do: Grab a roll of duct tape, and cut a piece a bit larger than the hole. You can stick it right under water and rub it onto your liner. It won’t last forever, but it’ll help keep the water in your pool until you can properly patch it.
Note: If your pool is concrete and develops cracks (which it will over time) that need to be patched, pool plaster repair is a whole other task with its own tools and precautions.
The Practicalities of Pool Liner Patching
So your pool is losing water, which means your liner has sprung a leak. Or does it? That information is key before you start patching anything.
Leak or Just Evaporation?
Most pools lose an average of about ¼ to ½ an inch of water every day to evaporation. But if you notice you’re losing an inch or more per day? That sounds like a leak. Maybe.
Confirm the Leak
Use the bucket test to be sure your suspected pool leak isn’t just evaporation.
Locate the Leak
When you’re sure you’ve got a leak, use the ink method to find the exact spot you need to patch. Determine whether the hole is small enough to patch, then whether you need to patch it wet or dry.
How Big is Too Big?
Patches are temporary. Some will last for years, but they’re not likely to last 15 years. And the bigger a tear is, the more likely the edges of the patch will get snagged, curl up, or pull away.
When the patch comes up on its own, you may be able to repair it. We’ll refrain from examining how meta it is to repair a repair. But if the patch gets caught on something and pulled off, it could further rip the liner, and then you’ll have a bigger problem than you started with.
No hard and fast rules apply to the size of leaks that can be successfully patched. You could have a 2-inch patch fall off after a day or a 10-inch patch stay in place for five years. The more important factor to consider is whether your liner is worth trying to patch.
If your liner is two years old and in great shape except for an 8-inch tear on the back wall, it’s certainly worth trying a patch. The tear is large, but the vinyl is otherwise strong and in a spot that won’t get much traffic.
If your liner 15 years old with a 2-inch tear next to the stairs, you definitely need to patch it to control water loss and prevent damage. But you also need to start shopping for a new liner.
An older liner is thinner, more prone to pinholes and weak spots, and more likely to spring more leaks. Patching may extend the life of your liner, but know that this leak is likely a symptom that the liner is nearing the end of its life.
Note: Areas of the liner close to the stairs, bead, or any of the fittings have the weight of the pool water pulling on them. They’re under more stress than other areas, so patches there may be less likely to hold up long term.
Frustrated by adding chemicals and trying to keep your pool clear all the time?
We cut out all the confusion of pool maintenance in this easy-to-read illustrated ebook and video course. It'll help you save $100 right away on pool care!
Click Here to Learn More
Instantly Stop Leaks
Quick fixes come in three flavors. All three can be applied underwater or dry.
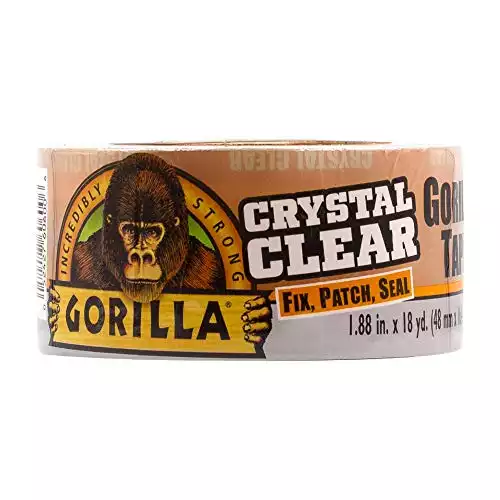
Waterproof Tape
Not specifically a vinyl pool patching product, waterproof tapes are marketed for all sorts of quick repairs. It’s similar to duct tape, but clear, waterproof, and UV resistant. The tape can be overlapped to create larger sections for patching.
It’s low cost, durable, and easy to re-do if necessary. It’s best for smaller patch jobs because it tends to peel.
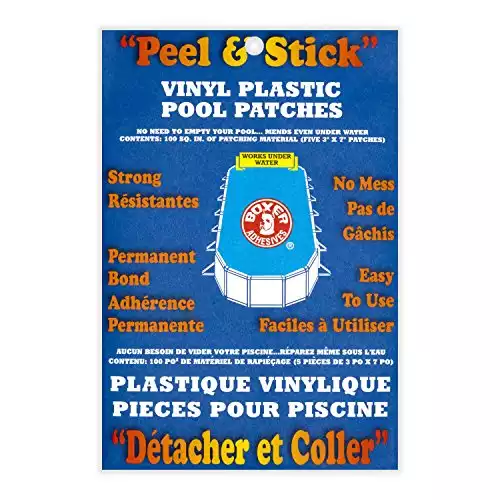
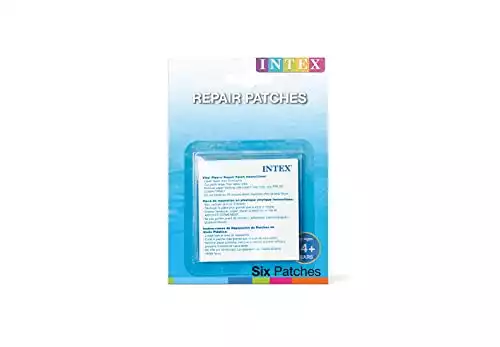
Peel-and-Stick Patches
As easy as waterproof tape, but made from real vinyl and designed for use in pools and on inflatable pool items. Some peel-and-stick patches are even pre-cut in perfect, neat circles. The round shape makes them less likely to peel up around the edges.
Just remove the paper backing, and press it over the leak. These are also inexpensive and best used on small punctures and tears.
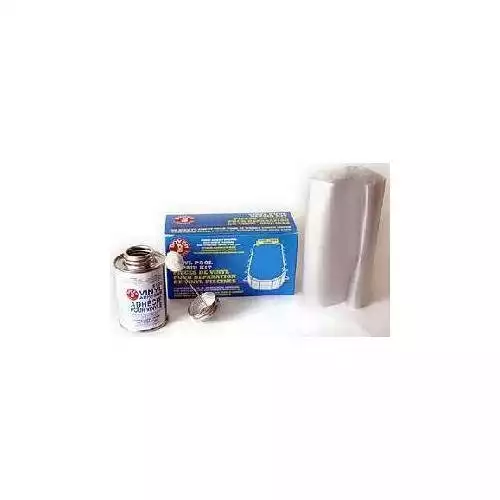
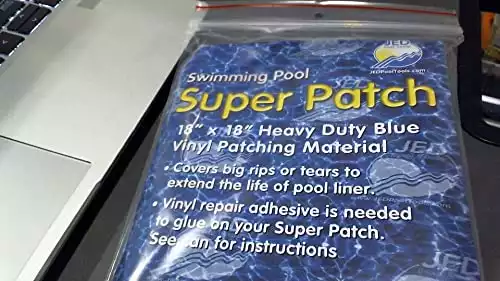
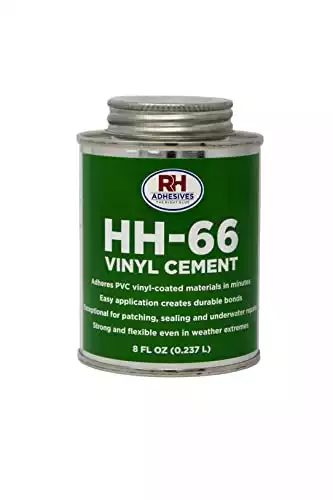
Vinyl Patch Kit
If you need to seal a slightly larger hole or you’re hoping for a longer-term fix, you can grab a patch kit. Kits include large chunks of liner and special vinyl adhesive that works underwater. Some come with blue and clear vinyl.
Patch kits for soft-sided above ground pools also include a piece of special laminated polyvinyl chloride (PVC) material, so you can properly patch the outside of the pool walls.
Wet or Dry Patch?
If the pool’s water level has dropped to the level of a wall leak, it’s okay to patch it dry. You don’t need to drain your pool to apply a patch to any leak, though.
How to Patch a Pool Liner Underwater
Letting all the water out can cause above ground pool walls to collapse. Emptying any pool with a vinyl liner dries it out and exposes it to damaging ultraviolet (UV) rays, which can make the liner brittle. And draining an inground pool can cause it to literally pop out of the ground if you’re not careful. It’s best to patch the liner underwater, unless the leak exposed it.
Important: Never drain an inground pool unless it’s absolutely necessary—not even before a hurricane—because it can further weaken your liner and even cause structural damage. If it’s necessary, and you’re not sure how to drain a pool, learn the process before you start, or hire a professional to do it for you.
You’ll need:
- Scissors
- Non-abrasive scouring pad
- Weight (pool cleaner head or brick wrapped in plastic wrap)
- Swimming goggles (if needed)
- Vinyl patch kit or vinyl adhesive
- Dauber applicator or craft stick (to spread adhesive)
- Patching vinyl
1. Clean the Area
Any debris, algae, sunscreen or other stuff stuck to your pool walls makes it harder for a patch or adhesive to adhere. Use a non-abrasive scouring pad to gently clean the vinyl around the hole. Do not scrub. You don’t want to make the hole any bigger.
2. Trim the Patch
If you’re not using peel-and-stick patches, cut the patching vinyl into a circle. Be sure it’s at least two inches larger in diameter than the hole. For example, if the rip is three inches long, the patch must be five inches in diameter.
3. Apply Adhesive
For peel-and-stick patches, remove the paper backing to expose the adhesive side. For all other patches, be sure it’s free of debris, then use the dauber to apply a generous amount of adhesive. Make sure it reaches all the edges.
4. Taco ‘Bout It
Fold the patch in half like a taco, with the sticky side out, then submerge it.
5. Stick It
Holding the patch over the hole, slowly and gently open the patch taco while smoothing it onto the pool liner. Press out any air bubbles, then hold the patch in place for two minutes. The adhesive needs to cure to reach its full strength, so resist the urge to tug on the patch to check it.
6. Apply Weight
Some patch products recommend putting weight on your patch for 24 hours while the adhesive cures. It’s next to impossible to apply weight to your pool wall. But if your patch is in a spot where it’s possible to do so, rest your pool cleaner head or a clean brick covered in plastic wrap on top of the patch.
7. Double Patch It
Placing a second patch over the first won’t make your fix any stronger, but if it makes you feel more at ease, there’s no reason you can’t double up. If you do, be sure to let the first patch cure completely before applying the second. Cut the second patch at least two inches larger in diameter than the first patch (making it four inches larger than the hole), so it can adhere to the pool liner and the first patch.
Easy Soft-Sided Vinyl Pool Patching
Intex-style pools are made from slightly different material than vinyl pool liners, but they can also be patched, even on the outside. You don’t need to empty them, either.
Patch kits for this type of pool usually include clear vinyl, blue vinyl, and exterior patch material (laminated PVC). The clear is for top ring repairs, the blue is for interior repairs, and the laminated PVC is for outer wall repairs. The adhesive works for all three. If you’re concerned about risks associated with PVC exposure, look for patch kits with bisphenol A (BPA)-free patching vinyl.
You can also find peel-and-stick patches for this type of pool, which may be easier to use.
Patching soft-sided pools follows the same process as with any vinyl liner, except when patching the top ring. Fully inflate the ring, mark the hole, and apply adhesive around it. Then apply adhesive to the clear patch and apply it. Press on it for a few seconds, then slightly deflate the ring so the adhesive can cure without pressure. After 12 hours, you can reinflate the ring.
When Patches Aren’t Enough
The road to a brand-new pool liner is paved with good intentions and waterproof tape. Eventually, no matter how good you are with a dauber and adhesive, your liner will give up the ghost. Knowing how to patch a pool liner can buy you time to find a replacement liner without letting leaks destroy your pool or property.
Once your liner has a patch or two, be sure to keep an eye them. If they start to pull up, work a little adhesive under the edges and smooth them back down. You can also double patch by smoothing a larger patch over one that’s starting to give out. Just remember, pool patches won’t last forever. But if applied correctly, you may well keep enjoying your pool liner for years to come.
Happy Swimming!

Recommended Guides
Repairing or replacing pool caulking may sound like a huge chore, but it’s actually pretty simple. More importantly, it can save you thousands of dollars.
One of the best things you can do is learn about all the essential parts of a pool. Otherwise, how are you going to know you're caring for it properly?
Pool looking faded and stained? It may be time for a new paint job! The key to bringing your pool back to life is choosing the right pool paint.
Rain can put gallons of untreated water in your pool, weakening sanitizer and filtration. You need to know how to drain water from your pool after rain.