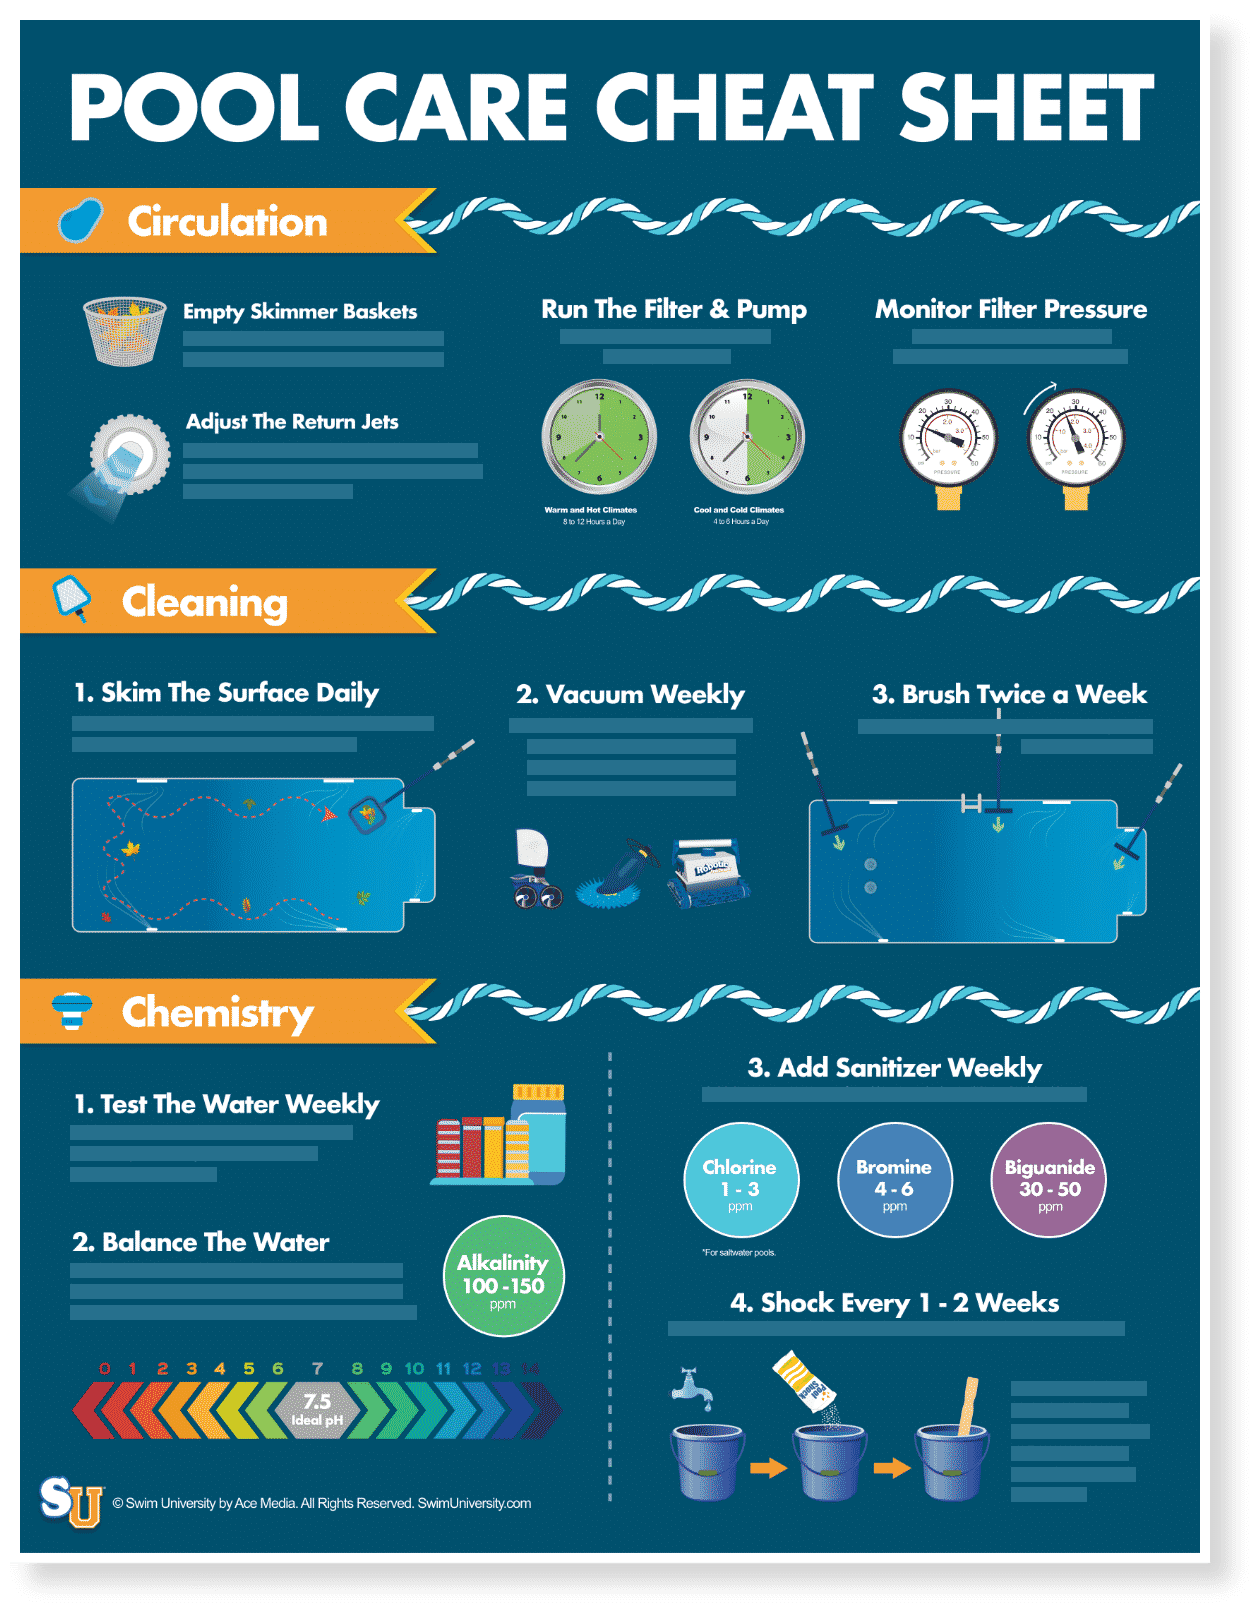
Every time you jump into your pool, it’s a sensation of being immersed in cool, clean water. But how clean is the water, really? Sure, you use sanitizer the way you’re supposed to and you clean the pool. But if it’s been a few years since your pool was filled, it may be time to drain it and start fresh.
And no matter how well you take care of your pool, there will come a time when it needs repairs, from minor touch-ups on a vinyl liner to plastering cracks in the cement. And it’s pretty hard to fix those spots on the floor of the deep end without removing the water first. So take a little time to learn how to drain a pool so you’re ready for anything.
Why Do You Need to Know How to Drain a Pool?
You’ve probably read that you shouldn’t drain your pool unless you absolutely have to. This is true, especially for inground pools.
You don’t want to drain your pool once a week just to scrub it or anything crazy like that. But a few tasks do require draining.
To Clean the Pool
We don’t mean your weekly, monthly, or even quarterly cleaning and maintenance. You can, and should, vacuum your pool while the water is in it.
But say your water source is high in metals or calcium. After a while (we’re talking years, remember), you may start to see stains and calcium deposits, even if you use a metal sequestrant and actively manage the calcium hardness levels.
The metal stains are just ugly. But the calcium deposits can start to have a detrimental effect on your pool’s surfaces and equipment, which will cost you money in repairs and replacements. You’ll want to drain the pool so you can scrub them away completely, or so you can acid wash the pool.
Adding calcium hardness to your pool water will protect and extend the life of your pool walls including vinyl, fiberglass, and concrete.
To Repair the Pool
Over time, holding thousands of gallons of water takes a toll on your pool’s liner and surfaces. A vinyl liner may start to bubble and tear, while a concrete pool may develop cracks.
Whether you need to replace or just patch a vinyl liner, or you need to perform some pool plaster repair, you’ll have to drain the pool to do it.
To Paint the Pool
Sitting out in the hot sun year after year is eventually going to fade the color of your painted concrete or gunite pool. Let’s face it, you want your pool to be functional and fun, but you also want it to look nice. To keep it looking its best, you’ll want to paint it every few years.
Important: Remember to only use pool paint made specifically for this purpose. Just any old paint won’t stand up to the chemicals, and you’ll have a mess on your hands.
To Change the Water
How long has the water in your pool been there? Months? Years? How many? Even if you’ve religiously kept up with maintenance and water chemistry, there will eventually come a time when you want—no, you need—to change the water.
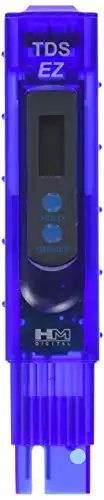
Eventually, the total dissolved solids (TDS)—the remnants of all the chemicals you’ve put into the water over the years, plus dirt, leaves, and any other contaminants—in the pool water will grow to the point where they cannot be filtered out. When that happens, it will interfere with your ability to maintain proper water chemistry.
Once the TDS level reaches about 2,500 parts per million, it becomes a problem. It’s not unsafe, but it will begin to require more and more chemicals to balance the water. Also, at that level, mineral stains may develop on the pool walls and floor. Let the high level go too long, and the liner material may even begin to deteriorate.
Once the TDS level reaches that high point, it’s extremely difficult to lower it. Think about it—is there really a way to put more chemicals in the water to reduce the residue of all the chemicals you’ve already put in the water? That’s sort of like trying to clean a spot of dirt by rubbing more dirt on it.
Draining the pool and refilling it with fresh, clean water is usually the best, if not the only solution. Use a digital TDS meter to monitor the level so you know when to replace the water.
To Do a Combination of Tasks
Are you draining the pool to make one repair on the floor? Why not acid wash the pool while you’re at it? Or go ahead and repaint it so you don’t have to drain it again in a year or two?
Take advantage of the empty pool to get as much maintenance done as possible, and drain it as infrequently as possible.
Before You Drain Any Pool
Taking a few precautions is a key part of how to drain a pool.
Have a Water Disposal Plan
Know where you’re going to direct all that pool water before you start pulling it out. Some municipalities prohibit draining pool water into streets or storm drains. And thousands of gallons of water is probably going to be too much for your yard to handle. You don’t want all those chemicals in your grass or the groundwater, anyway.
The usual process is to direct all that water down one of your home’s sewer cleanouts, but some areas may allow you to drain into the street. Your city may also have restrictions on when you can drain your pool. Always check with your local water authority to be sure.
Having a water disposal plan in place before you begin the draining process can help you avoid fines and environmental damage.
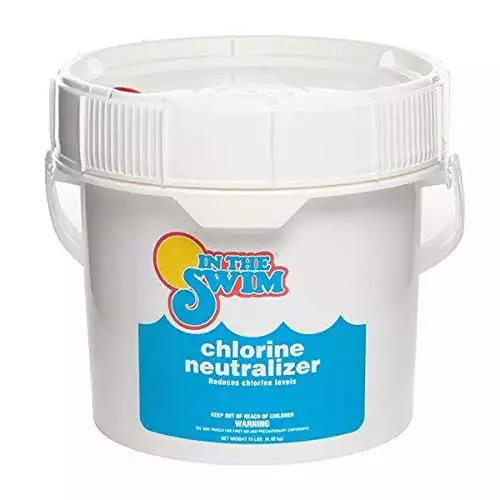
Allow Pool Chemicals to Dissipate
Regardless of where you’re going to dispose of the pool water, it’s best—and in most cities, required—to ensure the water does not have high levels of pool chemicals. It should be chlorine neutral, have a neutral pH, and not contain any additional chemicals you may use. Contact your local water authority for required chemical levels where you live.
To reduce levels, stop adding chemicals, and test the water until the water reaches the necessary chemical levels. If you need to drain the pool sooner (for an urgent repair, for example), you can use a chlorine neutralizer to speed up the process.
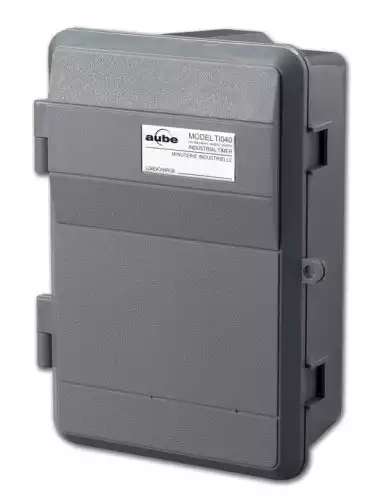
Turn Off Automatic Timers
If any of your pool equipment runs on an automatic timer, turn them off prior to draining so nothing turns on during the draining process.
This is important for your pool lights. They’re meant to work underwater, and are water-cooled devices. When they’re not covered with water, they can quickly overheat and shatter.
Turning off timers is especially important for the pump, which is also water cooled.
Important:Do not allow the pump to come on while you’re draining the pool. If it turns on after the water level has fallen below the skimmer, the pump can take on air, which can damage it.
Wait for the Right Weather
You might think a bright, sunny day is the perfect time to drain your pool. And it is—as long as it’s not too hot out.
Pools are meant to be full of water. When they’re drained, and the liner is dry and exposed to high heat, it’s vulnerable and can easily be damaged by the sun. An inground pool can even blister and crack if left dry in high temperatures.
To avoid this, drain your pool when the outside temperature is 85°F (29°C) or lower. If your pool needs to be drained, but you’re into the middle of summer when temperatures are going to remain high (especially if you live in a warmer climate), wait until autumn or even winter if that season is mild enough where you live.
Have Your Repair Supplies Ready
No pool is meant to sit empty and dry. Plus, you may get an unexpected rainshower or thunderstorm. Then you’ll just have more water to pump out, and more cleaning to do.
Having everything you need—tools, repair kits, paint—ready means you can get right to work and fill your pool back up as soon as possible.
What’s it Going to Cost?
Aside from being prepared for the actual task of draining your pool, you’ll need to be prepared in a couple of other ways as well.
It’s Going to be Expensive
In the United States, one person uses approximately 80 to 100 gallons (303 to 379 liters) of water per day. A large pool can hold 18,000 to 20,000 gallons ( to ) of water. The month you choose to drain and refill your pool, expect a hefty water bill.
You can be better prepared for it by knowing how many gallons of water you’re going to need to fill your pool. To know this, you need to know your pool volume. You can easily figure this out with a pool calculator.
 Rectangle
 Round
Round
Time is Money
Whether you’re draining or refilling your pool, you don’t want to leave it unattended. You’ll need to choose a day when you don’t have any other obligations so you can stay near the pool as it empties or fills. Both tasks are going to add up to several hours of valuable time.
How long it will take to drain your pool will depend on the size of your pool, and how many gallons per minute the pump can move. But you’re probably looking at somewhere between 8 and 14 hours for your pool to empty.
Same goes for filling it. The size of your pool, how many hoses you use, and what kind of water pressure you have are main factors.
The average outdoor spigot on a home will produce roughly 4 to 12 gallons per minute. A small pool could take just a few hours to fill, while a large one might take 14 hours. You can get an idea of how long it will take by using a pool fill time calculator.
Whether draining or filling be ready to spend a lot of time at home, near the pool, ready in case anything goes wrong.
Should You Drain Your Inground Pool?
This is probably the most important question to ask aside from how to drain a pool. Draining an inground pool isn’t as straightforward as it sounds. It’s not like draining a bathtub where you pull a plug and the water just goes down a drain where you don’t have to worry about its destination.
This task is a little easier for above ground and Intex pools. But for inground pools, you have other things to consider to avoid the dreaded pool pop.
How to Keep an Inground Pool from Popping
If you live in an area that has a high water table, and you completely drain your inground pool, it’s possible the pool will “pop.” This means, without the weight of the water pressing on it, the pool may be pushed up and out of the ground—literally. The risk is even higher if you drain your pool after several days of heavy rain.
An inground pool can pop regardless of type. Concrete, gunite, vinyl, fiberglass—they’re all at risk of popping when drained.
If it’s time to drain your pool, and you want to keep it from popping, consider draining just half the water from the pool, and refilling it. The ability to do this will, of course, depend on your reason for draining it in the first place.
For example, if you need to repair the floor, you’ll have to completely drain the pool. If this is the case, you may want to consult a professional to avoid expensive damage to your pool.
If you decide to move forward yourself, take a few extra precautions to help prevent popping.
Don’t Drain in the Rain
A period of heavy rainfall is the absolute worst time to drain your pool. The ground will be heavy with water, which increases the risk of it pushing the pool up and out as you empty it.
Wait for dry weather. And not just a day or two of it. Give the ground time to dry out after it’s absorbed a lot of rain. Remember, just because the ground looks dry on the surface doesn’t mean it’s not still saturated several feet down around the sides and bottom of your pool.
Dispose of the Water Correctly
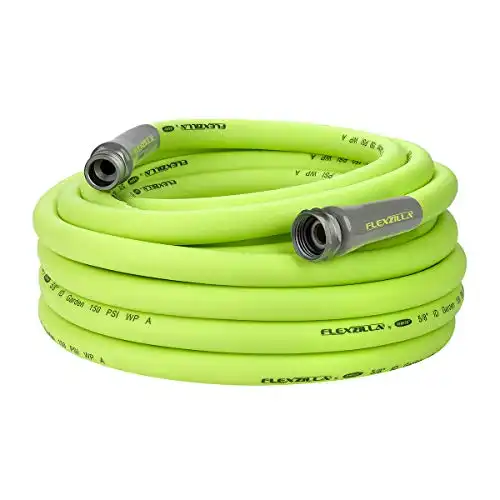
This is important when you drain any pool, but even more so for an inground pool. If your drainage hose isn’t long enough to reach the sewer cleanout in your yard, buy a longer hose.
Letting those thousands of gallons of water spill out onto the ground around your pool will have the same effect of heavy rainfall. The ground will absorb the water, and the pressure on your pool will increase.
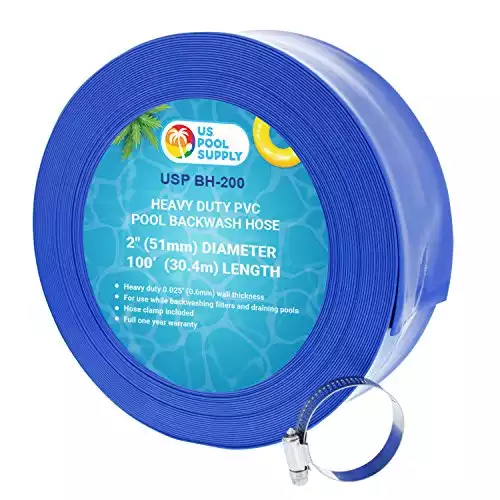
When backwashing your pool filter, use this easy-to-roll up and store backwash hose.
Direct the Drained Water Downhill
If possible, direct the drainage hose downhill from the pool. This is an extra precaution in case any drainage problems occur.
For example, if you’re draining into a sewer cleanout, you could run into a clog. Over time, the main drain line from your home will contain a buildup of residue. This can include grease, paper, and other waste that goes down all the drains in your home. You may not realize there’s a problem until you try to direct tens of thousands of gallons of water down the main drain.
This could cause the water to pool around the drain, and you have the same problem as if you’d just drained the water into the ground around the pool. Directing it downhill will help keep it away from the pool should you encounter any problems.
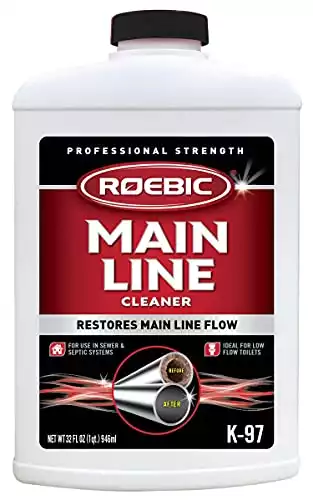
Note: If you’re concerned about a clogged sewer cleanout, and it’s been a while (or never) since you cleaned your home’s main drain, consider using a drain treatment before you drain your pool.
Open the Hydrostatic Pressure Relief Valves
First, what the heck are these things? You came here to learn how to drain a pool, and now there’s all this technobabble. Relax. That’s a really long name for a pretty simple but important feature.
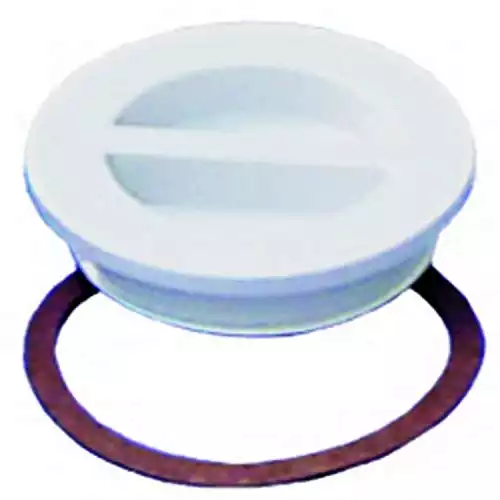
If you look at your pool’s floor, you’ll see at least one, but probably a few, white rings embedded in the floor. They’re plastered in place when the pool is built, but under that plaster, they’re threaded onto a slotted pipe.
This pipe runs along the floor of the pool, and then terminates into a gravel pit under the pool floor, which is also put in place when the pool is built. The purpose of these valves is to allow groundwater to come up into the pool if and when it’s drained.
If water accumulated under the pool with nowhere to go, it would create hydrostatic pressure, which is what would make the pool pop. These valves help relieve that pressure, thereby preventing (hopefully) popping.
Important: Do not open any hydrostatic pressure relief valves until the pool is mostly drained. When the pool gets to that point, you may only need to open one valve to relieve any built-up pressure. The valve in the center of the deep end is best. But if you live in an area with a high water table, you may want to open two valves to be on the safe side.
To open a relief valve, use a hammer and chisel to break and remove the plaster inside the cap, which will reveal the threaded plug. Use large pliers to twist the plug counterclockwise and remove it.
Once the valve is removed, you may see water come up into the pool. You may even have a mini-geyser spring up. This is completely normal. In fact, it’s exactly what you want. It means you’ve given the water under the pool a place to go rather than staying stuck under there, and pushing your pool out of the ground.
Simply continue to pump water out of the pool. The flow should stop after a little while.
Once you’ve done what you need to do, and you’re ready to refill the pool, replace the valves. It’s entirely possible that chiseling and twisting the valve out of place will mangle it, so you may need to get a new valve plug. Put some Teflon tape on the threads before twisting it into place to prevent leaking.
Get to Work
You don’t want to leave any pool empty for too long. But leaving an inground pool empty and exposed to the air and sun for an extended period of time can damage the liner.
Have all your repair and improvement supplies on hand, work quickly, and get the pool filled up again in no more than one week.
Frustrated by adding chemicals and trying to keep your pool clear all the time?
We cut out all the confusion of pool maintenance in this easy-to-read illustrated ebook and video course. It'll help you save $100 right away on pool care!
Click Here to Learn More
Never Use the Pool Pump to Drain the Pool
You might’ve seen advice here and there on the internet saying that to drain your pool, all you need to do is put your filter in backwash or waste mode, and use the pump to pull water out of the pool.
We do not recommend this method.
Your pump is connected to the pool’s skimmer. This is where water enters the filtration system, which is powered by the pump. And pool pump motors are water-cooled devices.
If you use the pump to pull water from the pool, as soon as the water level falls below the skimmer, your pump will start pulling in air. Without water to keep it cool while it runs, it will eventually overheat, and possibly break beyond repair, which means you’ll have to buy a new pool pump.
There are ways to avoid this, but frankly, the process is more complicated than it needs to be. When it comes to expensive pool equipment, we like to err on the side of caution and use simpler, safer methods.
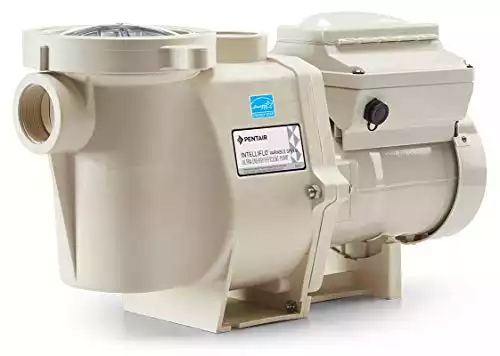
For bigger inground pools needing a 3 horsepower motor. Built-in control panel with 8 programmable speed settings and a timer. Best for pool owners looking to save money on their energy bills.
How to Drain an Inground Pool
Knowing what you’re doing before you start can help the process go more smoothly, and help you avoid costly damage.
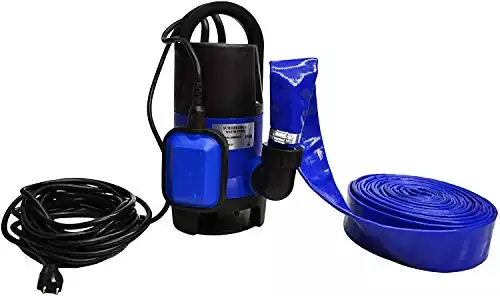
1. Rent or buy a submersible pump.
You can likely rent one from a local hardware or home improvement store, but they’re not that expensive if you’d rather have one on hand. Place the submersible pump on the floor in the center of the deep end.
- Make sure the power cord is long enough to reach from the bottom of the deep end to the nearest outlet without being stretched. Avoid using an extension cord if possible.
- Also make sure the drainage hose is long enough to reach from the pump to the spot you’ll be using to dispose of the pool water.
2. Monitor the Draining Process
Make sure all the hoses and cords stay connected, and that the drainage hose remains in directed at the disposal location to avoid any flooding issues.
3. Turn Off and Remove the Submersible Pump
You’ll reach a point where the water level is so low, the pump can no longer pull any water out of the pool, and you’re left with a smallish puddle. This is normal, and acceptable. The amount of TDS in that little puddle isn’t going to be enough to interfere with your chemical balance once you refill the pool.
4. Open a Hydrostatic Pressure Relief Valve
Remember, you need to give any groundwater accumulated under your pool an escape route to keep your pool from popping.
5. Perform the Work You Drained the Pool For
Repairing, painting, whatever you need to do, do it quickly so you can refill the pool as soon as possible.
6. Replace the Hydrostatic Pressure Relief Valve
Be sure to have a new valve plug on hand in case the original is damaged during removal. Use Teflon tape on the threads, and tightly twist the plug into the valve.
7. Refill the Pool
Put one or two (or more!) garden hoses in the pool, turn on the spigots, and keep an eye on the rising water level.
8. Turn on the Pool Pump
When the water reaches about the middle of the skimmer, turn the spigots off, remove the hoses, and turn the pool pump on. You may need to prime the pool pump again if it’s been off for quite a while.
9. Balance the Water
Because you’re starting with fresh, clean water, follow the same steps you use for pool opening every season.
10. Enjoy!
Get back into your regular maintenance routine, and enjoy your pool!
How Not to Drain an Above Ground Pool
Before you learn how to drain a pool, it might be helpful for you to see exactly how not to do it.
How to Drain an Above Ground Pool for Repairs
If you’re draining it to store it for the winter, skip ahead. If you want a complete guide on using just a hose to drain an above ground pool, be sure to check out our post on How to Drain an Above Ground Pool Even Without A Pump.
1. Rent or buy a submersible pump.
You can likely rent one from a local hardware or home improvement store, but they’re not that expensive if you’d rather have one on hand. Place the submersible pump on the floor in the center of the pool.
- Make sure the power cord is long enough to reach from the pump to the nearest outlet without being stretched. Avoid using an extension cord if possible.
- Also make sure the drainage hose is long enough to reach from the pump to the spot you’ll be using to dispose of the pool water.
2. Monitor the Draining Process
Make sure all the hoses and cords stay connected, and that the drainage hose remains in directed at the disposal location to avoid any flooding issues.
3. Turn Off and Remove the Submersible Pump
You’ll reach a point where the water level is so low, the pump can no longer pull any water out of the pool, and you’re left with a smallish puddle. This is normal.
4. Perform the Work You Drained the Pool For
If you’re repairing or replacing the liner, do it quickly so you can refill the pool as soon as possible.

5. Refill the Pool
Put one or two (or more!) garden hoses in the pool, turn on the spigots, and keep an eye on the rising water level.
6. Turn on the Pool Pump
When the water reaches about the middle of the skimmer, turn the spigots off, remove the hoses, and turn the pool pump on.
7. Balance the Water
You already know how to open an above ground pool, so follow those same steps for adding chemicals and balancing the water.
8. Enjoy!
Get back into your regular maintenance routine, and enjoy your pool!
How to Drain an Above Ground Pool for Storage
You have a couple of extra considerations when draining the pool to put it away for the winter.
1. Rent or buy a submersible pump.
You can likely rent one from a local hardware or home improvement store, but they’re not that expensive if you’d rather have one on hand. Place the submersible pump on the floor in the center of the pool.
- Make sure the power cord is long enough to reach from the pump to the nearest outlet without being stretched. Avoid using an extension cord if possible.
- Also make sure the drainage hose is long enough to reach from the pump to the spot you’ll be using to dispose of the pool water.
2. Monitor the Draining Process
Make sure all the hoses and cords stay connected, and that the drainage hose remains in directed at the disposal location to avoid any flooding issues.
3. Turn Off and Remove the Submersible Pump
You’ll reach a point where the water level is so low, the pump can no longer pull any water out of the pool, and you’re left with a smallish puddle. This is normal.
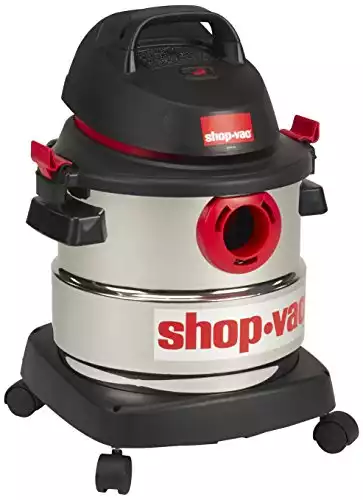
4. Remove the Remaining Water
You can do this easily with one of three methods:
- Use a Shop-Vac to vacuum the water out.
- Sweep the water out the pool drain.
- Remove the liner from the frame, and flip it over to dump the water out.
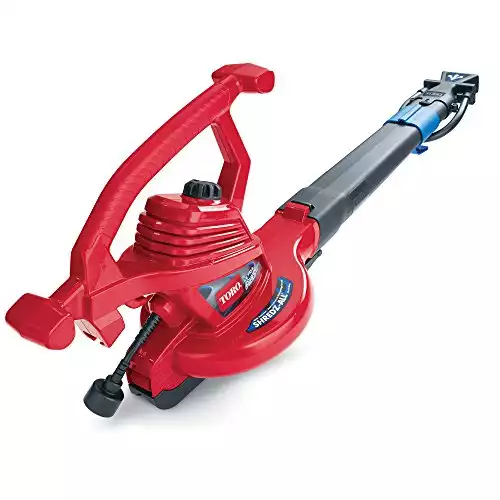
5. Dry the Liner
You have a few options for this task as well.
- Use a leaf blower. This is the fastest and easiest method.
- Wipe it down with towels. Labor intensive, and you’ll probably need a lot of towels.
- Let it air dry. Caution: If the liner is left under a hot sun for too long, it can fade or become damaged.
6. Fold the Liner
This is at least a two-person job. Lay the liner out on your yard. Avoid placing it on a hard surface like the driveway because this can scratch or tear it. Gently fold the liner into a 12″ x 12″ square. Just kidding! Just fold it as neatly as you can.
7. Store the Liner
Don’t be tempted to just toss it onto the floor of the pool shed or your garage. You may find some nasty surprises when you open it next season, like mold or holes chewed in it by mice.
Store the liner in a sturdy box with a lid to keep it dry and protected.
8. Protect the Pool Frame
If you plan to leave the frame set up, cover it with a tarp and secure it to keep it from blowing away in windy weather.
If you’re going to completely dismantle the pool, follow the manufacturer’s instructions, and then store all the parts in a dry, clean area.
9. Look Forward to Next Year!
You can rest easy all winter knowing your pool is safely put away until next season.
How to Drain an Intex Pool for Repairs
If you’re draining your Intex pool to store it, you can skip ahead.
1. Remove the Cap From the Drain Valve
You’ll find this located on the outside of the pool, toward the bottom.
2. Connect a Garden Hose to the Drain Valve
You may need an Intex adapter to connect the hose to the drain valve. Then direct the other end of the hose to the area where you’re going to drain the water.
Tip: If the pool chemicals have dissipated enough that the water is neutral (test the water before you start draining), you can connect the hose to a sprinkler and water your yard or garden as your pool drains. Reuse that water rather than just letting it go down a sewer drain!
Important: Use that neutral water only on your yard or garden. It’s not suitable for consumption by humans or animals.
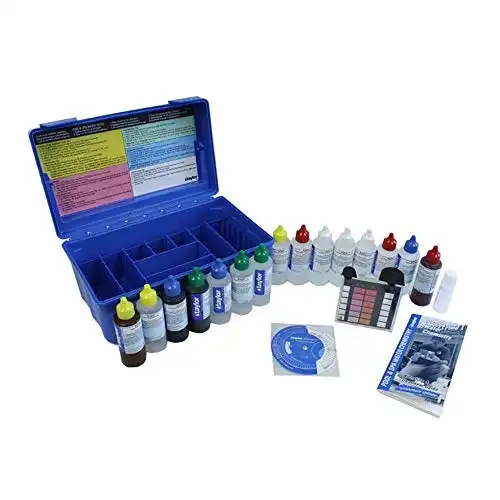
A simple but effective liquid test kit for chlorine pools and hot tubs.
3. Monitor the Draining Process
Make sure the hose stays connected, and that the water continues to go where it’s supposed to.
4. Perform the Repairs
Quickly patch the liner or fix whatever it is you need to fix so you can refill the pool as soon as possible.
5. Replace the Drain Cap
You’ll notice pretty quickly if you forget to put this part back on before you start refilling!
5. Refill the Pool
Put one or two (or more!) garden hoses in the pool, turn on the spigots, and keep an eye on the rising water level.
6. Turn on the Pool Pump
Once the water covers the top of the skimmer, and the skimmer cover can float, turn the spigots off, remove the hoses, and turn the pool pump on.
7. Balance the Water
Basic pool care and water maintenance are pretty much the same for Intex pools as any other pool, so just make sure you have all the necessary chemicals on hand, and test strips to adjust levels as necessary.
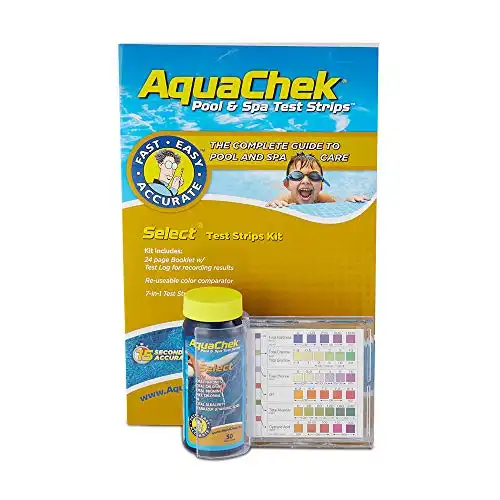
Tests for 7 important chemistries in seconds: Total Hardness, Total Chlorine, Total Bromine, Free Chlorine, pH, Total Alkalinity, and Cyanuric Acid.
8. Enjoy!
Get back into your regular maintenance routine, and enjoy your Intex pool!
How to Drain an Intex Pool for Storage
Intex pools are made to be easy to put up and put away.
1. Remove the Cap From the Drain Valve
You’ll find this located on the outside of the pool, toward the bottom.
2. Connect a Garden Hose to the Drain Valve
You may need an Intex adapter to connect the hose to the drain valve. Then direct the other end of the hose to the area where you’re going to drain the water.
Tip: If the pool chemicals have dissipated enough that the water is neutral (test the water before you start draining), you can connect the hose to a sprinkler and water your yard or garden as your pool drains. Reuse that water rather than just letting it go down a sewer drain!
Important: Use that neutral water only on your yard or garden. It’s not suitable for consumption by humans or animals.
A simple but effective liquid test kit for chlorine pools and hot tubs.
3. Monitor the Draining Process
Make sure the hose stays connected, and that the water continues to go where it’s supposed to.
4. Dry the Pool
Once the water has drained from the pool, you’ll need to dry the interior. You can leave the pool standing to air dry, though this will take longer, and you run the risk of debris falling into the pool while you wait, making more work for yourself.
If you’d rather speed up the process, you can use a Shop-Vac to remove the remaining water, or use soft towels to wipe the pool dry.
5. Replace the Drain Cap
To keep everything together, and avoid losing such a small part, screw the pool drain cap back onto the valve. This will also help keep any tiny critters from finding their way into the folded pool once it’s put away.
6. Fold the Pool
Once the pool is empty and completely dry, fold the walls in on all sides. Then pull one side of the pool over until it meets the other side. This will be a lot easier if you get someone to help you. Continue folding the pool until it forms one long strip that measures about 3 or 4 feet wide. Then you can fold or roll it up for storage.
7. Store the Pool
Don’t be tempted to just toss it onto the floor of the pool shed or your garage. You may find some nasty surprises when you open it next season, like mold (especially if you didn’t dry it well enough) or holes chewed in it by mice.
Store the pool in a sturdy box with a lid to keep it dry and protected.
8. Look Forward to Next Year!
You can rest easy all winter knowing your Intex pool is safely put away until next season.
Don’t Strain Your Brain When You Drain
Regardless of what type you have, learning how to drain a pool is an essential part of overall pool care. Once you’ve done it a time or two, it won’t seem so daunting. Just follow all the steps and take all the precautions, especially if you have an inground pool.
Being able to drain your pool so you can make repairs or make improvements like painting will ensure your pool not only remains in good working condition for many years to come, but looks good at the same time.
Happy Swimming!


Recommended Guides
Rain can put gallons of untreated water in your pool, weakening sanitizer and filtration. You need to know how to drain water from your pool after rain.
Leave a crack in your concrete pool for too long, and you could have a leak on your hands. Learn how to perform pool plaster repair before that happens.
Learning how to patch a pool liner could save you thousands of dollars and prevent extensive damage. Plus, it's easy enough that almost anyone can do it.
One of the best things you can do is learn about all the essential parts of a pool. Otherwise, how are you going to know you're caring for it properly?